Choosing the Best Base layer
Whatever your chosen outdoor activity, from walking or climbing to running or snowsports, choosing the best base layer for your activity can make a huge difference to your comfort and performance.
One key benefit of baselayers are their ability to dry quickly, transporting moisture away from your skin. Depending on the material, they also often resist odours, and they can be softer on your skin than some other types of fabric or clothing.
This all-important layer that is often not changed for days on end and acts like a second skin is no place to skimp. Our guide will help you learn how to choose the best baselayer for your needs.
Base layer Material
The choice of baselayer fabrics really comes down to a couple of options: synthetic fabric or wool. Each of these options has it’s own advantages.
Wool Base layers
Wool has been used in clothing for centuries, and is well proven as a baselayer. Most good wool baselayers use some mix of merino wool as the main fabric component. It is sometimes blended with small amounts of polyester, or other synthetic materials to increase the properties of the garment.
Merino Wool is also well known for its ability to dry very quickly and resist odours. Some merino base layers include activated carbon additives to enhance the wool’s wicking and quick-drying properties even further. An added bonus of activated carbon treatments is they tend to fight odours even more effectively than just merino wool alone.
Synthetic Base layers
Synthetic base layer materials often use polyester as the primary component.
Although many manufacturers use their own special fabric technologies, the fabrics themeselves are often actually very similar across the different brands. Many polyester-based garments blend other materials other synthetics into the cloth to add extra stretch. Some synthetic fabrics also include antimicrobial treatments to help fight body odour.
When if comes to choosing between wool or synthetic, decisions are often made based on price point. Merino wool can be more expensive, however many people will still choose wool for its softness and natural feel.
Weight
Baselayers are used in a wide range of weather conditions and activities, from freezing ice climbing and snowsports to hot summer runs. To accomodate all of these extremes, base layers can come in a wide variety of weights.
Lightweight Base layers
Many people select a lightweight baselayer as their first layer against the skin, no matter the temperature. Lightweight baselayers help pull moisture away from the skin and are very versatile. Both synthetic and wool lightweight base layers are good on their own for hot temperatures, or under many other layers in the colder conditions.
Mid Weight Base layers
A mid-weight base layer can be worn against the skin or over a lightweight base layer as extra insulation. Most mid-weight options are thick enough to provide warmth on their own, especially if used with a light weight shell on top. These layers are a common choice in Summer mountaineering clothing, around the campsite at night, or as part of a winter layering system.
Heavy Weight Base layers
Heavy baselayer clothing is usually just for winter use. Although they can be useful at other times of year as stand-alone tops, they generally give too much insulation for warm weather activity. Wearing heavy weight baselayers close to the skin provides an effective wicking layer that dries quickly and also insulates against the cold.
Compression Base layers
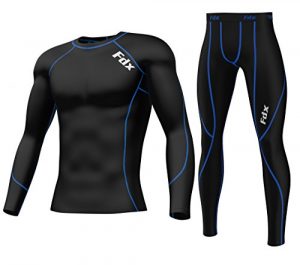
Some base layers are designed to be tight fitting. These layers are called compression layers, and they work by reducing vibration and lateral movement in working muscles, which research has shown can help reduce fatigue. Compression garments are popular in running and other sports, where you can see a benefit from this type of muscle stabilisation.
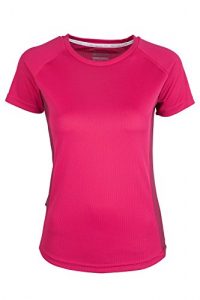
Base layer Tops
From technical t-shirts worn all year-round, to heavy Winter options, base layers are popular tops for all sorts of activities. They can be worn in a broad range of conditions and most are designed to also look fashionable. Features to consider are long zips or buttons under the collar that can be opened to release heat during aerobic exertion, thumb loops on long sleeve models and hoods, which can significantly add to the warmth and versatility of the layer.
Base layer Bottoms
Sometimes also known as long johns, modern base layer bottoms are a fantastic piece of kit for Winter activities. A heavy weight bottom worn underneath a shell is often enough insulation for downhill skiing or snowboarding, even on moderately cold days.
When choosing bottoms, also take into account the weight of your other layers. Will you only wear a shell over the bottoms or do you wear insulated shell trousers? Insulated trousers need much less additional warmth and a lightweight base layer will probably be better for all but the very coldest of days.
Anti-microbial Base layer Properties
Most base layers deal with body odour to some extent. Most commonly, some type of antimicrobial treatment or additive slows the growth of the bacteria that causes body odour smells. While most manufacturers treat their base layers in some way, some work better than others. It can be worth investigating the way the treatment is applied and how long it’s guaranteed to work. Some older treatments were known to wash out of garments over time., while modern textiles are tested for antimicrobial properties through around 50 washes.
Sun Protection with SPF and UPF
If you’ve ever used sunscreen you’ll know about SPF, however UPF is a slightly less seen rating that’s also used for garments. It stands for Ultraviolet Protection Factor and many base layers include an additive to increase resistance to ultraviolet radiation. They will frequently list the SPF rating of base layer shirts as part of the technical information for the product.
As a comparison, a thin white cotton t-shirt will have a UPF rating of about 4, while a dark blue cotton t-shirt could be as high as 18. Looking for a UPF or SPF rating on outdoor clothing guarantees a measured level of protection.
Base layer Seams and Stitching
Finally, some tight fitting base layers, especially compression layers, have specially stitched seams during their production process, that help to eliminate chafing.
Summary
We hope you found this a helpful guide to choosing the best base layer for you. Why not take a look at our wide range of base layers for some fantastic deals and special offers.